 Online store owners know how important it is to analyze the data to run a successful business in today’s highly competitive world. Having an e-commerce store on one of the leading eCommerce platforms like Shopify may ease the task. The platform’s built-in features will help you process your data effectively when you have a few products, clients, or sales. But if you have a large online store you need more powerful tools to deal with all the incoming information. Business intelligence solutions like Tableau are the best choice. So here we will see how you can easily perform Tableau Shopify integration and turn your data into useful insights.
Essential Shopify Data To Analyze
With more than $5.1 billion+ sales a year and 20$ of the market share, Shopify is one of the leading e-commerce platforms. A company launched in 2004 by two Canadians who couldn’t find the right e-commerce site to sell snowboard equipment, has now evolved into an online retail behemoth with more than 1.7M merchants and over 7,000 employees.
As all the transactions take place within this platform, including sales, shipping, and payment processing, it is a crime not to use all that data for your business understanding and planning.
Shopify itself has a helpful analytics tracker that allows you to get data based on your store’s performance. The main metrics give you a glimpse of how the visitors interact with your eCommerce site. They include online store sessions, number of sales, returning customer rate, store conversions, total orders, and the average order value.
You can also use some of the basic reports available on Shopify. By default, Shopify provides the following reports: Sales, Retail Sales, Customers, Orders, Behavior, Finance, Marketing, Acquisition, and Profit Margin.
Please note that the reports and metrics you see will depend on your Shopify subscription plan.
Shopify Analytics is a good tool to have a sneak peek of what is going on in your company, but when you need detailed analysis, a more advanced solution i. e. BI platform is a must.
Benefits of Tableau for Shopify Data Analysis
Tableau is one of the most powerful and flexible analytics platforms that provide all the needed tools to simplify raw data and gain useful insights into any kind of business. And eCommerce is not an exception. So here are some reasons why you should use Tableau software to analyze your Shopify data:
Advanced visualization options. The platform makes it easier to understand your data with the help of bar charts, rich maps, and other visualization tools with tons of customizations.
Merge data from different sources. With Tableau, you can add your Shopify data to any other data sources that will be useful to get the whole picture of issues you are interested in.
Analyzing data in a quick, iterative way. Tableau’s drag and drop interface allows you to save time and try new ideas without additional effort.
Intuitive user experience. Tableau software is easy to use and doesn’t require any technical or any kind of programming skills to operate.
Enterprise-grade security. With Tableau security and governance models, you can be sure that your data is kept in the right hands at all times, even when scaling analytics across your organization.
Shopify has no built-in tools to export data to Tableau. This means, that to perform a Tableau Shopify integration, you should either load your store data to a database or cloud data warehouse, and then connect Tableau to this database, or use a third-party Tableau Shopify connector. The latter is the easiest and the most efficient way to connect Tableau to Shopify. So, let’s see how you can do this just in a few steps.
Tableau Shopify Integration: Step-By-Step Guide
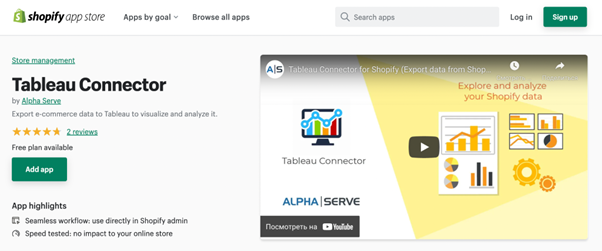
Tableau Connector is the only application for Tableau Shopify integration available on the Shopify App Store. It was developed by reliable Ukrainian software development company Alpha Serve and allows you to export your Shopify data to Tableau in the easiest and least time-consuming way.
The plugin also has some other benefits.
- You can set a scheduled automated refresh to get your data updated to a certain date and time.
- There are useful filtering options that help you to get only the data you need for further processing.
- The app does not collect any customer data, so you can feel safe about your store’s security.
- It fits users not having any programming skills. The app allows creating connections between both tools easily with URL and without any specific knowledge.
- A free plan allows creating 1 data source with a max of 500 export rows for export and includes a Weekly auto-update.
For those who consider using Power BI for Shopify data analysis, the Power BI Connector is available.
There are only a few steps you need to do to connect Tableau to Shopify with the app. Let’s study them in detail.
Step 1: Install Tableau Connector For Shopify
Find the Tableau Connector page on the Shopify App Store and click the Add app button. Read the details on the Confirmation page and click Install app. Immediately after the successful installation, you can start creating the data sources.
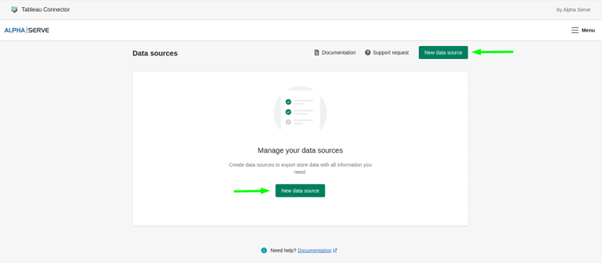
Step 2: Create A Data Source And Prepare Data For Export to Tableau
In the Tableau Connector app hit New Data Source.
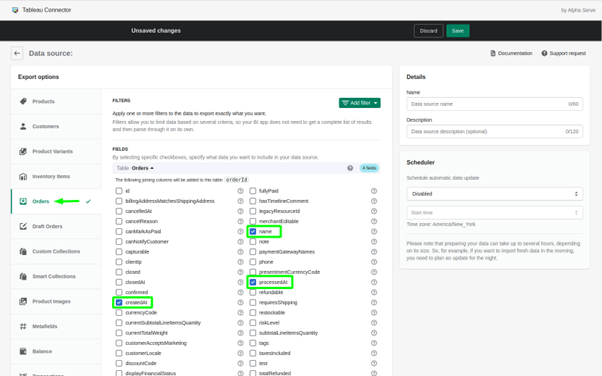
Fill in the required parameters: a new data source name and description. If you want the data to be updated automatically, go to the Scheduler section, select one of the 4 possible options (Disabled, Continuous, Every day, and Weekly).
The fields and tables available for export will be displayed in the main Export options section. They are grouped in specific tabs according to their data types. You can select the page you need (for example, Orders), check boxes next to the fields you’d like to export data from, or use built-in filters to further narrow your choice. Press Add filter to see the available field selection options in a drop-down menu. Hit Save when you’re done.
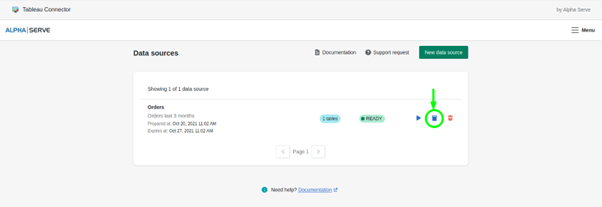
Now when the data source is created, go back to the Data sources page. Here you can see all the data sources and their statuses. The newly created data source will have a “Not Ready” status. You can click the Start button under the Actions menu to launch the data preparation. The status will be changed to “Pending” and then to “In Progress”. After the completion, you will see the green status “Ready”.
Step 3: Import Shopify Data To Tableau Software
To export the data to Tableau, you need the Data Source URL generated by the app. Just click the Copy icon in the Actions menu.
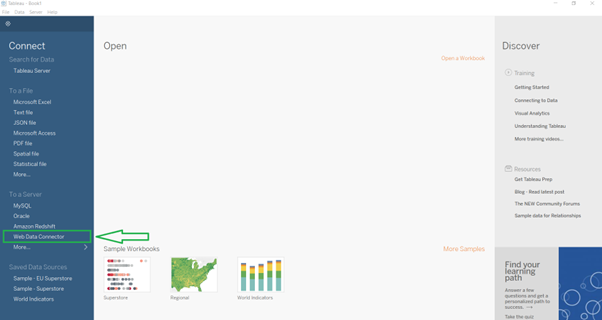
Enter this URL in the web data connector field on your Tableau Desktop. Then hit Enter.
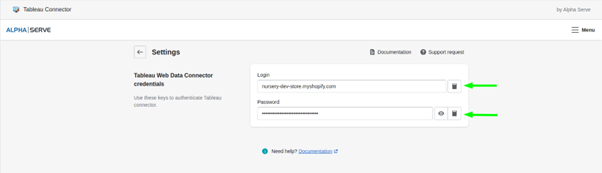
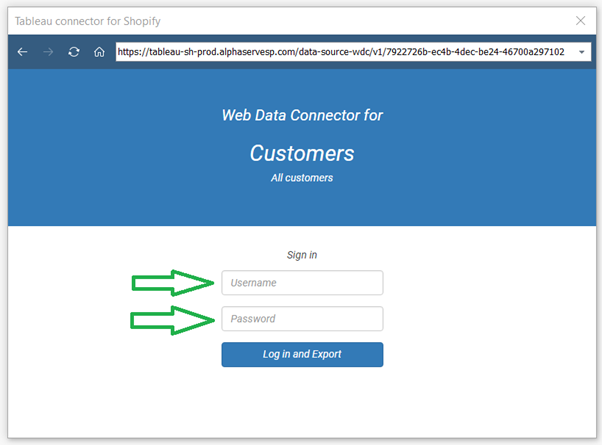
The authorization in Tableau will be required. Copy login and password from the Settings page in the Tableau Connector interface.
Click Log in and Export.
The data source fields will be displayed on the next screen. Select the table and drag it to the main screen. Click Update now, and all the selected data will be automatically loaded into your Tableau Software.

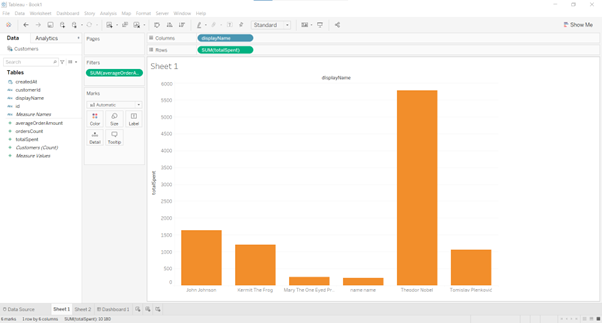
Well done! Now you can start to build reports and visualizations in Tableau based on the Shopify data you have exported.
 Favorite